Are you tired of reaching for that familiar, small can of diced green chiles, only to find yourself wondering if there's a fresher, more flavorful alternative? You’re not alone! Many home cooks become quite smitten with the convenience of store-bought diced green chiles, frequently adding them to everything from cheesy enchiladas and hearty tortilla soups to zesty tacos and comforting casseroles. But what if we told you that the secret to superior flavor, vibrant freshness, and knowing exactly what goes into your food is to simply make diced green chiles yourself?
Indeed, stepping away from the canned varieties from brands like Ortega or Old El Paso can be a culinary revelation. And the best part? It’s surprisingly easy, incredibly rewarding, and yields a product far superior in taste and texture. This comprehensive guide will walk you through the simple process of creating your own fresh diced green chiles using the fantastic Anaheim pepper, proving that garden-fresh goodness is just a few steps away.
Why Choose Homemade Anaheim Diced Green Chiles?
The allure of convenience is strong, but the limitations of canned goods often reveal themselves in the muted flavors and sometimes rubbery textures. When you choose to make diced green chiles from scratch, especially with Anaheim peppers, you unlock a world of culinary advantages that canned versions simply can't match.
The Anaheim Advantage: Your Perfect Pepper Pick
Curiosity often leads us to investigate the origins of our favorite ingredients. If you've ever wondered what type of pepper makes up those mild diced chiles in a can, the answer is most commonly the Anaheim pepper. This versatile pepper offers a mild to medium heat level, typically ranging from 500 to 2,500 Scoville Heat Units (SHU), making it comparable to or slightly milder than a Poblano (1,000-2,000 SHU). This ideal heat profile makes it perfect for replicating the familiar taste of store-bought mild chiles, but with a freshness that elevates any dish.
For those with a green thumb, Anaheim peppers are a dream to grow. Varieties like "Highlander" are particularly renowned for their incredibly high productivity. Picture this: just two or three plants could provide you with an entire season's worth of peppers! They grow to an average height, similar to bell pepper plants, but with an astonishing abundance of fruit. Many gardeners who discover the Anaheim's prolific yield become lifelong devotees, planning to grow them year after year.
Beyond the joy of harvesting your own produce, making diced green chiles with Anaheim peppers is incredibly simple, requiring just two primary ingredients: fresh Anaheim peppers and a touch of salt. That's it! No strange additives, no preservatives, just pure, wholesome flavor.
Flavor and Freshness Unmatched
The difference between fresh, roasted, and diced Anaheim peppers and their canned counterparts is night and day. Freshly roasted peppers boast a delicate smoky aroma, a tender-yet-firm texture, and a vibrant, sweet-and-savory flavor profile that canned versions, no matter how good, simply cannot replicate. The roasting process caramelizes the natural sugars in the peppers, intensifying their flavor and adding a depth that enriches any recipe.
Furthermore, by choosing to make diced green chiles at home, you have complete control over the ingredients. You eliminate concerns about sodium content, BPA-lined cans, or other additives often found in processed foods. This makes your homemade chiles not only more delicious but also a healthier choice for your family.
Your Step-by-Step Guide to Making Diced Green Chiles
Ready to embark on this flavorful journey? Here’s a detailed, practical guide to make diced green chiles that will revolutionize your cooking.
Preparation is Key
- Wash and Dry Thoroughly: Begin by washing your Anaheim peppers under cool running water to remove any dirt or debris. Pat them completely dry with a clean kitchen towel. Any moisture remaining on the peppers can hinder the roasting process and prevent proper blistering.
- Stem, Halve, and Seed: Carefully cut off the stem from each pepper. Then, slice each pepper in half lengthwise. Using a spoon, scoop out the white membrane and all the seeds. Discard these into your compost bowl. Removing the membrane and seeds is crucial for a milder flavor and a cleaner texture.
The Art of Roasting for Flavor
Roasting is where the magic happens, transforming raw peppers into tender, smoky flavor bombs. For a comprehensive guide on the roasting process and more, check out our related article: Homemade Diced Green Chiles: Easy Roast, Peel, Dice Guide.
- Prepare Your Pan: Line a baking sheet with parchment paper. This prevents sticking and makes cleanup a breeze.
- Arrange Peppers: Arrange your halved peppers onto the parchment-lined baking sheet. To maximize space and allow for more peppers per batch, try reversing some of the halves when lining them up.
- Roast to Perfection: Preheat your oven to a high temperature, around 450 degrees Fahrenheit (232°C). Roast the peppers for approximately 15-25 minutes. The exact time will depend on your oven and the size of your peppers. Your goal is for the skins to be visibly blistered and slightly browned, but not burnt. Begin checking the peppers around the 10-minute mark to ensure they don't overcook. The blistering helps immensely with skin removal.
Pro Tip: Consider making several batches at once. One 4 oz can of diced chiles typically contains about 4-5 Anaheim peppers. Since the process is so straightforward, preparing a larger quantity to freeze for later use is highly efficient and saves time in the long run.
The Magical Skin Removal Trick
Removing the skins from roasted peppers might seem daunting, but with this simple trick, they'll peel off almost effortlessly.
- Cool Slightly: Once the peppers are removed from the oven, let them cool on the baking sheet for just 2-3 minutes, until they are cool enough to handle without burning your fingers.
- Steam and Peel: Transfer the slightly cooled peppers to a heat-safe bowl. Immediately cover the bowl tightly with a clean kitchen towel. Let it sit for about 15 minutes. The trapped steam will create condensation, which loosens the skins, making them incredibly easy to pull off, often in one satisfying piece.
- "Naked" Peppers: After 15 minutes, uncover the bowl and simply peel off the loosened skins. They should come away with minimal effort, leaving you with smooth, tender pepper flesh.
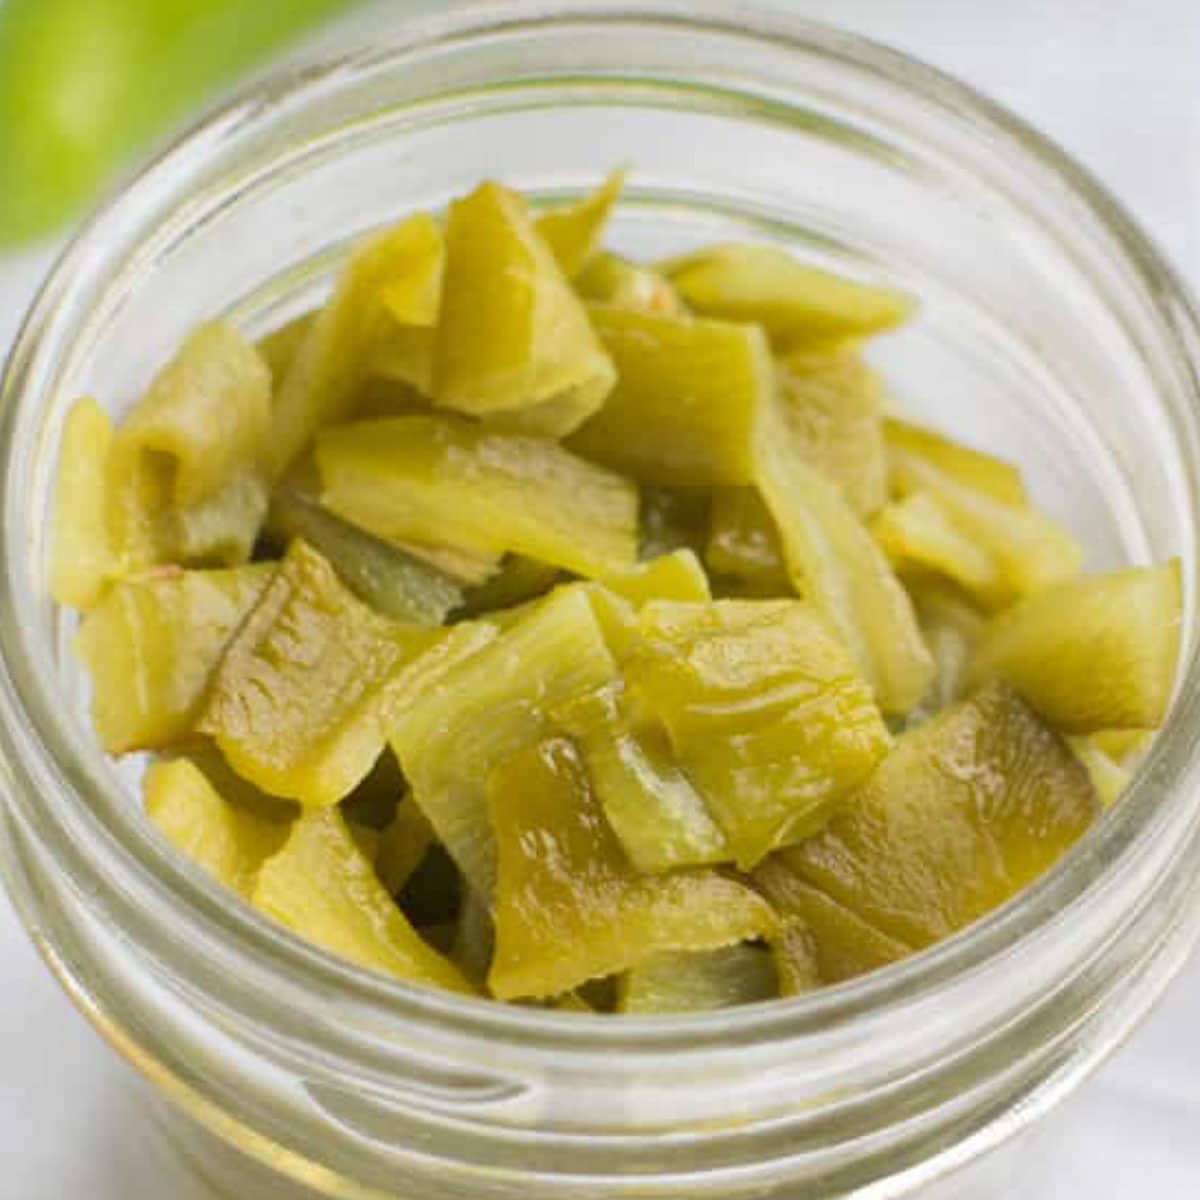
Dicing for Perfection
You're almost there! Now it's time to transform your roasted, peeled peppers into the diced chiles you crave.
- Slice into Strips: Take each peeled pepper half and cut it lengthwise into a few skinny strips.
- Dice Evenly: Gather the strips together and dice them crosswise into small, uniform pieces. Aim for a consistent dice size for even cooking when you incorporate them into your recipes.
- Season Lightly: For every estimated 4 oz batch (equivalent to a small can), add just a tiny dash of salt. You don’t need any other ingredients to enhance their natural flavor. The beauty of these homemade chiles lies in their simplicity and freshness. For more on this minimalist approach, read Just 2 Ingredients: Craft Delicious Diced Green Chiles.
Storing Your Homemade Green Chile Gold
Once you’ve gone to the effort to make diced green chiles, you’ll want to ensure they last. While they’re best enjoyed fresh, proper storage allows you to savor their goodness for weeks or even months.
- Refrigeration: Freshly diced green chiles can be stored in an airtight container in the refrigerator for up to 5-7 days. Some avid gardeners even dedicate a drawer in their fridge just for their pepper harvest!
- Freezing for Long-Term: This is arguably the best method for preserving your homemade bounty. Portion the diced chiles into freezer-safe bags or small containers (e.g., in 4 oz equivalents, similar to canned portions). Flatten freezer bags to remove air, then stack them in your freezer. They will maintain their quality for up to 6-8 months, ready to be pulled out and used directly from frozen in most cooked dishes. Freezing also helps break down the cell walls slightly, which can enhance their tenderness when cooked.
- Canning: While this article focuses on the roast-and-dice method for immediate use or freezing, canning is another fantastic, more advanced option for long-term preservation of peppers. If you're interested in traditional canning, there are many excellent resources available for safely preserving peppers.
Beyond the Can: Culinary Uses and Creativity
Now that you know how to make diced green chiles, get ready to elevate your everyday meals. The versatility of these homemade gems is incredible, bringing a fresh, subtle heat and earthy flavor to a wide array of dishes.
- Mexican Cuisine Staples: They are indispensable in enchiladas, burritos, quesadillas, and of course, your famous homemade green chili.
- Soups and Stews: Stir them into tortilla soup, chicken chili, or even a hearty vegetable stew for an extra layer of flavor.
- Breakfast Boost: Add them to scrambled eggs, omelets, or breakfast burritos for a delightful morning kick.
- Casseroles and Bakes: Enhance your favorite casseroles, mac and cheese, or cornbread with their distinct taste.
- Dips and Spreads: Mix them into creamy dips, guacamole, or a cheesy spread for an appetizer with a kick.
- Salsas and Sauces: They add a fantastic depth to homemade salsas and other savory sauces.
Don't be afraid to experiment! The fresh, nuanced flavor of homemade diced green chiles will inspire you to try them in dishes you never thought possible, far beyond the confines of that little can.
Conclusion
Ditching the canned version and taking the small leap to make diced green chiles from fresh Anaheim peppers is a culinary decision you won't regret. The superior flavor, vibrant freshness, and the satisfaction of a homemade ingredient truly set them apart. With just two simple ingredients and a few easy steps, you can transform humble peppers into a versatile, flavorful staple for your kitchen. So, grab some Anaheims, follow this guide, and prepare to elevate your cooking with the unmatched taste of fresh, homemade diced green chiles!
